Thursday 16 December 2010

Merry Christmas......

Christmas is now literally only around the corner......nine day to be precise, and this year i will be baking more goodies than i have in previous years. Every year on Christmas eve, we all go around to my mum & dad’s house for drinks and food, my mum always puts on a huge buffet which never fails to impress.

This year i will be adding to this feast with a few homemade sweet treats, so look out for them on the blog, at this point in time i am making a white chocolate cheesecake (Mums favourite), truffles & cupcakes with mascarpone topping, and ganache!!!

Merry Christmas
Toni – T - Cake

T-Cake Gallery

As promised, here are some pictures of the cakes that i have made recently for T-Cake, the sister site of T-Cakery, i have been making cakes for over a year now and i am still learning, i hope you enjoy looking at them as much as i did making them.....and hopefully the customers did eating them!!!


This ‘Bedroom’ cake was made for my sister’s 21st birthday and actually cemented a full year of cake making for me. I wanted to make something special that you don’t really see that often and also something that was personal to her. So as my sister is renowned for not being the tidiest of people, i opted to recreate her bedroom, complete with dirty clothes & unwashed plates. I also included a model of her in the bed, with some of her favourite items. The sponge was a moist vanilla flavour filled with gooey chocolate fudge filling. I took my time adding all the little details, and even put the wooden grooves on the floor boards!!


This cake was made for a Christening and is one of my personal favourites out of all the cakes i have done. The sheer size of this creation was overwhelming, it’s hard to tell from the photo but the bottom layer was immensely big. Everything on this cake is made from fondant and the building blocks on the top spell out the baby’s name. The bottom tier is made from a rich chocolate sponge and filled with chocolate fudge and the top tier is moist vanilla sponge and strawberry jam.


This slight naughty cake was made for a 30th birthday. The customer specified to me the exact colour she required and i had fun making this Basque look more girly than the black and red one i did previously. I think the tassels on the front add a fun flirty feel to this cake. The sponge on this one was again vanilla, but filled with homemade butter cream and strawberry jam!!


This cake was made to match the invitations used for this birthday party. The customer’s showed me the actual cake they wanted to work from and together we picked elements to put together on this cake. Again the size of this cake was enormous, and it was really heavy. I actually weighed this cake and it was a stone in weigh!! By far the heaviest i have ever made. The sponge was vanilla, and this was filled with butter cream and jam!!

I have a cake ready and waiting in my kitchen for an order due on Saturday, this one is a Ben 10 cake - i love the look of it and cannot wait to show it on here!!!

Happy Baking
Toni - T - Cake

.......and after that pause, im back!!!

Firstly i want to apologise for the lack of actual blogging on T-Cakery lately, i have been so busy with cake orders from T-Cake that i’ve not had time to do anything else. I will upload some pictures from afew cakes i have made recently.

Secondly i am now the proud owner of a Kenwood Titanium Major!!! I cannot begin to describe how much easier this little mixer, or should i say rather large mixer, has made my life. I can now move about and prep my work whilst the eggs are being whipped, and the butter is being creamed rather than having to constantly stand over the bowl!!! The pleasures come from the small things.....


The actual mixer i got came with all of the above attachments (if not more), so now i can mince my own meat, make sausages & burgers from scratch, no more guessing how much meat is actually in them!! I can blend, mix, whisk, blitz, juice and grind every ingredient imaginable, oh and they threw in a nice set of Kenwood scales, a recipe book, and two DVD’s!!!

Happy Baking
Toni – T- Cake

Wednesday 10 November 2010

Technically soup isnt baking.....


This week i have been knee deep in soup!! My cupboards are groaning under the weight of all the vegetables and bread rolls that i keep stuffing into them. I think the weather plays a huge part in what i tend to eat and now that the dark nights have crept in and the temperature has dropped – gone are the pesky salad’s and quiches and in with the soups and hot foods.


I’ve made two batches of delicious soup this week alone and cannot begin to guess how many pans of soup lay ahead in my future!!! The soup that i have been making this week doesn’t really have a name, i guess it could be called ‘Three Veg & Garlic’ – hmm doesn’t sound very appealing.
The veg i threw in were asparagus, carrots, leaks, onion and garlic. The overall end result of the soup was thick and yummy, add to this a warm bread roll and you can’t beat it for a winter warmer!!


You can even do what i did and make extra so you can take some to work the next day – and if I’m being honest, after a night of stewing the flavours seem to pop more and i thoroughly enjoyed it today for my dinner!!!

If you fancy making this quick and easy tea for yourself, check out my recipe below. You can play around with ingredients and spices and see what other little gems you can create – let me know if you stumble across anything nice, i’d love to add more soups to my list.


Ingredients
·         1 bunch of asparagus
·         Carrots
·         1 Leak
·         1 onion
·         Garlic
·         Chicken/Vegetable stock
·         Olive oil

1)      Add a small amount of olive oil to a pan and turn onto a low heat.
2)      Chop the onion,asparagus, carrots and leak into bite size pieces and add to the pan and allow them to sweat gently for approx 5-10 minutes or until tender.
3)      Drop one (and a half depending on your own preference) stock cubes into 500ml boiling water and allow to dissolve – pour this over the vegetables. Your looking to have the waterline just above the top of the veg.
4)      Turn the heat up to allow the stock to boil, then lower this back down to a gentle simmer. At this point add your garlic. (Overcooked garlic turns bitter).
5)      Leave the pan simmering for another 10 minutes, or until all the vegetables are tender. Then blast this in a food processor, or with a handheld blender to churn out all the chunky vegetables. (Don’t worry if you don’t have a blender, this soup can be enjoyed chunky, but i would recommend blitzing this down if possible).
6)      Add sea salt and cracked black pepper to taste and a drop of cream to garnish if required.

This soup is a really healthy soup – the only thing you are adding is water and vegetables so this is why its another favourite of mine. Warm a bread roll up to add to this dish if desired. I would have made my own bread but i couldn’t wait that long – the smells in my kitchen from this dish were too alluring!!!

Happy Souping!!
Toni – T - Cake

Please note the pictures used in this post did not belong to me (excluding the 'winter' pic, this one is mine) - i didnt have chance to take any of my yummy soup, as soon as i make this again - i'll upload mine!!

Sunday 31 October 2010

A Weekend of Baking - Saucy Cake


The other week I was asked to make a 21st birthday cake for a member of my extended family. The brief was a boob cake, but nothing too saucy as the older generation would be present. It was ironic that I had an order for two boob cakes on the same weekend.

As this cake would have a body on it and not just boobs like the Pink Friday cake, I used a one pint pyrex dish to shape the boobs on this cake, and then carved a body/waist out of a normal square sponge. I covered this with black and red fondant and added some eye popping details.


The yellow sponge recipe was once again featured in this cake, and it was deliciously filled with smooth strawberry jam and vanilla butter cream.


The cake went down a storm, and I was frequently asked for the details of who this cake was modeled on :o) – boys will be boys…..no matter what age!!

Happy Baking
Toni – T - Cake

A Weekend of Baking - PINK Friday

You may of noticed that I didn’t feature a Baking Bowl challenge this week, that was due to the amount of baking that I already had in the pipe line this week.

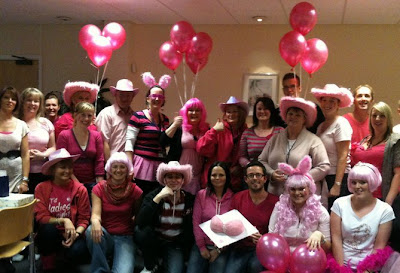
On Friday 29th we held a PINK Friday in work, this was held to raise money for breast cancer and I was asked to bake some goodies. In keeping with the pink theme, originally, I decided I was going to bring out the chocolate crinkles with a pink twist and some pink cupcakes. In the end, I made a batch of pink cupcakes, and a novelty boob cake which was to be raffled off.


For these little pink babies, I used my fool proof ‘Yellow Sponge Recipe’ which I actually found online. When I first came across this, it was measured in cups and not metric, the look and textured of this sponge sounded like something I had been looking for so I asked the owner of the recipe whether she could amend the recipe and show it in metric aswel, and she did this without a moments hesitation. I’m really glad I asked, because this is the best sponge I have made, and is the one I choose to  make all my cakes with. The overall texture of this cake is soft and moist, but not oily and greasy. It stands up well when faced with fondant and yet is delicate enought to be draped in frosting and not be too bland!!


After this batter was mixed I added a small blob of pink colouring. I used the pink from the ‘Sugarflair Colours’ collection. This turned my batter a vivid colour which I thought would surprise people as they bit into it. (I didn’t manage to capture a picture of the inside of one of these lovely gems). To decorate these I made my trusty vanilla buttercream and again added a dollop of PINK colouring. Then I simply piped this over the cooled sponge and topped them off with two decorative chocolate hearts, one milk and one white.

 
To create my BOOB cake, I again used the ‘Yellow Sponge’ recipe and poured the batter into a two pint Pyrex dish. If you decide to do this, be sure to leave at least an inch and a half of space at the top of the bowl, this batter rises when being cooked and can easily flop out over the sides.


Once cooked, I halved the sponge and simply filled them with a vanilla butter cream before decorating the top with fondant.

Yellow Cake Recipe
INGREDIENTS
280g SR Flour
2 tsp baking powder
1/2 tsp salt
230g butter (I swear by Stork)
400g Caster sugar
4 egg yolks
2 tsp vanilla essence (or pods if you have these, one pod should be plenty)
240ml milk
4 egg whites
METHOD
  • Preheat the oven to 180’ and line your chosen cake pan with baking paper, or grease it thoroughly with butter.

·         Sift the flour, baking powder and salt into a bowl.


·         In another bowl, cream the butter and sugar together for about 2 minutes. Add egg yolks one at a time, mixing well after each egg. Add in the vanilla.

  • Add the flour mixture to the sugar/butter batter bits at a time, alternate this with the milk. You should begin and end with the flour. Try to add small amounts of milk at a time as too much milk will cause the mixture to split.


  • Beat the egg whites in another bowl until soft to medium peaks. Make sure bowl and whisk are clean and grease free, or the eggs will not thicken. Fold half the egg whites in the batter to temper. Then fold in the rest of the egg whites.

  • Pour batter in prepared cake tin(s) and bake for approx 45 minutes. The cake is ready when an inserted wooden skewer or cake tester comes out clean or when cake springs back when lightly pressed with a finger. (Remember this is a moist cake)

Buttercream Icing
An easy to make egg-free icing that works great for decorating cakes for birthdays. When you need to add colouring to icing, use colour paste. If you use liquid colouring, you may need to add more icing sugar.
Ingredients
250g butter, softened
1 teaspoon vanilla extract
600g icing sugar
2 tablespoons of milk
Preparation method
1.       In a large bowl, cream together the butter and vanilla. Blend in the sugar, a quarter at a time, beating well after each addition. Beat in the milk, and continue mixing until light and fluffy. Keep icing covered until ready
2.       to decorate.

Lots of lovely cakes were made on the day and we raised a lot of money for this brilliant cause!!!

Happy Baking
Toni – T - Cake

Monday 25 October 2010

Wholemeal Cheese Scones


As promised, here are some yummy pictures of the cheese scones I made. I decided to change them to whole meal  as opposed to white. I actually prefer brown/granary/whole meal breads to white, and the fact they are healthier make me feel like I can eat more of them!!!

As these are a savory snack, I coated then in egg wash prior to putting them into the oven, I know that egg wash tends to dry harder than coating them in milk, the egg resulted in them looking almost like pork pies, with a gorgeously brown glossy colouring.


The scones came out after 18 minutes in a hot oven, and they sounded hollow to the tap. They have a delicious little crunch to them, which gives way to a spongy fragrant centre which is divine.

The recipe below calls for chives to be added, but I didn’t want these in my scones so I didn’t add them….simple. The fact this recipe is so diverse really appeals to me, you can add almost any ingredients you want. I think the next time I make these, I will add sundried tomatoes….not only will the splash of colour look visually great, but the little bursts of flavor will make these little scones pop. Add some blobs of feta cheese and these little gems could go all Mediterranean.


If you attempt the recipe below, let me know how yours turn out and what quirky combinations you decide to go for….. the options are endless.

The recipe below is by Kerrie Sun and you can find it on the following website -  www.taste.com

 
Ingredients
  • 1 1/2 cups wholemeal self-raising flour
  • 1 1/2 cups plain self-raising flour
  • 1/2 teaspoon baking powder
  • 1/4 teaspoon salt
  • 50g butter, chopped
  • 1 cup grated vintage cheddar cheese
  • 1 1/2 tablespoons finely-chopped fresh chives
  • 1 1/4 cups milk
  • butter, to serve
Method
  1. Preheat oven to 220°C. Line a large baking tray with non-stick baking paper. Combine flours, baking powder and salt in a large bowl. Using fingertips, rub butter into flour mixture until mixture resembles fine breadcrumbs. Stir in cheese and chives. Make a well in the centre.
  2. Combine 1 cup milk and 1/2 cup cold water in a jug. Pour milk mixture into well and stir with a flat-bladed knife until dough almost comes together. Turn onto a lightly-floured surface. Knead gently for 1 minute or until smooth (do not overmix).
  3. Roll dough out to a 2cm-thick, 20cm x 26cm rectangle. Cut dough into 16 squares.
  4. Place scones 1cm apart on tray. Brush tops with remaining milk. Bake for 18 to 20 minutes or until light golden and hollow when tapped. Serve warm with butter.

 Happy Baking

Toni – T - Cake

Thursday 21 October 2010

Peanut Butter M&M's - Genius


So, I’m sat here in work munching on peanut butter MnM’s, flown lovingly over from the big ol’ U S of A. There is something about salty chocolate that just work so well, these little bad boys are addictive. Once i get my baking order’s out of the way, i want to work with peanut butter and chocolate or salty caramel and chocolate – both combinations sound delicious to me.

If you know any good recipes let me know and I’ll give them a go..........

Happy Baking
Toni – T - Cake

Bakers Bowl - Week 2

This week i have decided to take on the scone –and not just any scone, oh no a cheese scone. For the next couple of weekends i have cupcakes and novelty cakes to bake so i wanted to try something savoury (for once).

The recipe calls for mustard and cayenne pepper to be used, which hopefully should give it a spicy little kick.

I'll bake these little pud's over the weekend and let you all know how i get on. Pictures to follow.....

Happy Baking
Toni – T - Cake

Sunday 17 October 2010

Macaroon Attempt 2


I tried to put my failed macaroons out of mind, but those French little buggers just wouldn’t leave my thoughts, I looked on YouTube to see if I had done something wrong, and to see what other tips I’d be able scramble together. That being said, other than the recipe listed previously, nobody else mentions placing the almond and icing sugar into a food processor………maybe this is just one of those things, different people, with different baking opinions.

Not wanting to be defeated by these chewy meringue blobs I took to the kitchen once more to try my second attempt. I whizzed the almond and icing sugar together in a processor, and if I’m being totally honest, the consistency didn’t alter much from my first attempt – although, that being said, it was a little less chunky.
The overall look of the batter was a lot smoother this time around and came out of the piping bag at a rather alarmingly fast pace, I tried to keep my piping method the same for each mound, keeping them to the same shape and size…I didn’t manage to completely make them all identical, but it’s the thought that counts.


These macaroons were coloured ‘Party Green’ with Halloween being nearby, I thought I’d in keep with this theme and go for an almost ghoul like look. These were piped onto a baking tray lavished with butter (id ran out of baking paper and didn’t have the chance to replace it yet) and placed into a low oven for 15 minutes as before.

The colour on these didn’t fade as much as last time, they faded slightly, but overall they popped more than my first batch. Still with Halloween on the forefront of my mind, I opted for a rich brown chocolate ganche (250g good quailty dark chocolate/250g double cream). I wasn’t overly impressed with the butter cream in my first attempt, so wanted to take a different direction, I already know that mascarpone works wonders. The good thing about ganche, is you can create gorgeous little truffles with the left over’s….not good for the waistline, but I find with real baking, it never is.


I’m a lot happier with my second attempt at these delicious little goodies, but again they weren’t velvety smooth……as you can see from my pictures, the air bubbles from the batter are extremely visible, very annoying I can tell you. I would love to know how to create the silky look of a successful macaroon. This is my new mission.


These little green gems tasted amazingly good, they had a perfectly crisp shell and a chewy middle, I’m told this is the correct consistency for a good macaroon. I’ll have to work on the ‘feet’ and the size – but all is fair in love and baking!!
Happy Baking!!
Toni – T - Cake

Macaroon Attempt 1


So, the ingredients were brought and the method was firmly attached to a wall in my kitchen but still, my little debut macaroons failed to shine.  I followed the recipe almost to the book, the only step I didn’t do was putting the ground almonds and icing sugar into a food processor prior to sieving….which I think was the one step I NEEDED to do. I also added a pink paste colour to the macaroons but they faded dramatically in the oven.


For the middles, I gravitated away from the recipe, the recipe calls for the butter cream to be made up of 175g butter, to 75g of icing sugar…..this seemed a lot of butter and was not how I usually make my butter cream, so I swapped the measurements around and used a small knob of butter to a lot of icing sugar, diluting it with vanilla extract (usually I would use milk as well). I coloured the butter cream a vivid pink (this was the shade of pink the macaroons were prior to being put in the oven, so judging from the pictures you can see just how much these faded).


To mix it up a bit I thought id also try a mascarpone filling, which I coloured a vivid green. I mixed a small amount of caster sugar into a tub of mascarpone and added this to the middle of the macaroon shells.
I didn’t pipe the fillings into the shells; these were pressed on using the back of a spoon. The next time I attempt this I will probably go for chocolate ganache which will be piped; I will also use the food processor.
Overall I’m abit deflated with how these have turned out, and I almost didn’t upload these pictures BUT this is a beginners baking blog and I am starting from the bottom so any mistakes I make I will share with you!! Looks like this will have to be added back into the bakers bowl and a second attempt is definitely needed.

Please find this Delicious recipe below.........if you give it a go yourself, please let me know how your's turn out!!
Happy Baking
Toni – T - Cake


Ingredients
  1. 175g icing sugar
  2. 125g ground almonds
  3. 3 large free-range egg whites
  4. 75g caster sugar
For the filling
  1. 150g butter, softened
  2. 75g icing sugar
·         As mentioned above I swapped around the measurements of the filling.
Method
  1. 1. Preheat the oven to 160°C/fan140°C/gas 3. Whizz the icing sugar and ground almonds in a food processor to a very fine mixture, then sift into a bowl.
  2. 2. In a separate bowl, whisk the egg whites with a pinch of salt to soft peaks, then gradually whisk in the caster sugar until thick and glossy. (At this point you can stir in flavour extract, such as peppermint or lemon, and corresponding colouring such as blue or yellow, to your meringue mixture, depending on what kind of macaroons you want – see chef's tip. Or divide the meringue among different bowls if you want to make more than one colour.)
  3. 3. Fold half the almond and icing sugar mixture into the meringue and mix well. Add the remaining half, making sure you use a spatula to cut and fold the mixture until it is shiny and has a thick, ribbon-like consistency as it falls from the spatula. Spoon into a piping bag fitted with a 1cm plain nozzle.
  4. 4. Line 2 baking sheets with baking paper. Pipe small rounds of the macaroon mixture, about 3cm across, onto the baking sheets. Give the baking sheets a sharp tap on the work surface to ensure a good ‘foot’. Leave to stand at room temperature for 10-15 minutes to form a slight skin. This is important – you should be able to touch them lightly without any mixture sticking to your finger. Bake for 15 minutes. Remove from the oven and cool.
  5. 5. Meanwhile, make the filling/s (unless making chocolate macaroons – see chef's tip). In a bowl, beat the butter until light and fluffy, then beat in the icing sugar. (You can now add flavouring or nuts, and colour – see chef's tip.) Use to sandwich pairs of macaroons together.

Friday 15 October 2010

Bakers Bowl - Week 1

So, I’ve decided that my aim is to try and bake something once a week; it will probably be on the weekends when i have more time on my hands. The challenge out of my baking bowl* for this weekend is Macaroons!! Multicoloured macaroons lovingly packed with butter cream to be exact.
I’ve found a good little recipe by Lizzie Kamenetzy posted on the Delicious website. This particular recipe (to be posted later) has a three out of five star rating, so seems like a winner.
Macaroons are coming back into fashion in a big way, so this seems like something i should start working on!!


*Baking Bowl – I have asked for people to suggest recipes/goodies for me to make. My tooth is stubbornly sweet, so anything savoury seems to pass by me unloved. Some of the suggestions from today are cherry or cheese scones, millionaire’s shortbread, and chocolate crunchy/chewy caramel slices......this seems like an old school goodie and will probably send you right back to your primary school days......if only i knew what the actual cake was called.

Thursday 14 October 2010

Chocolate Peanut Crinkles


The other day i actually ventured out into the big world of baking and made some ‘Peanut Chocolate Crinkles’. These biscuits were a mix of cookies and brownies, but truth be told, mine were edging more towards the cookies (due to a few too many minutes in the oven, Doh!!!)  They were a rich, but not bitter, chocolate biscuit, with roasted peanut scattered throughout.
These little gem's are dropped into a bowl of icing sugar before being baked for 10-15 minutes. Meaning that when the biscuit cooks it bursts open creating a cracked layer of icing sugar with rich chocolaty centre which visually looks really impressive.
I stumbled across this recipe on Edd Kimber’s food blog, where he advises that he originally took this recipe from Bill Yosses ‘The Perfect Finish’.
If you want the recipe for youself, please visit Edd’s page http://www.he-eats.com/ (Edd was the well deserved winner of The Great British Bake Off, for those who recognise the name but can’t quite place him).
I’m thinking of adapting this recipe slightly, purely for my own tastes. I want to add more peanuts than recommended, and i want to also try dropping the mix into the chopped nuts as opposed to the icing sugar. We are hosting a pink day in work on the 29th to promote/raise money for breast cancer – it is, after all, breast cancer awareness month. In keeping with this theme of pink all items on the day will need to have some element of pink in them. I’m going to be baking cupcakes (chocolate/vanilla, pics to follow) and these crinkles. I will again be tweaking the method of these by letting the chopped nuts soak in pink food colouring prior to being rolled on the outside (i also found out rather excitingly, that if you freeze the batter, they don’t freeze solid, and if you fancy a sneaky treat you can eat the batter raw out of the freezer....obviously the mix has raw egg in it, so not appropriate for pregnant ladies).
Happy Baking!!
Toni - T-Cake

.......and so it begins......


Okay – set the scene. It’s a Saturday afternoon, the house is clean, the pets are fed, you’ve maxed out your credit card and your feet are killing from all the shopping you’ve just done. You’ve got a two hour gap in your schedule before your so called other half is home and you have to start cleaning the kids, cleaning the pets, and walking endless circles picking up after the male species -  the question is, how do you fill your two hours? I know what I’d do, I’d hot foot it to the kitchen, close the door behind me and bury my nose in recipe books until something jumped out the pages at me. That, my friends, was before i discovered my love for baking blogs, seriously, these things are like baking gold dust..........well, some of them are like gold dust, and others are, well........without being disrespectful, hard to follow, hard to picture, and sometimes, hard to pronounce. This might just be me and my baking ability, but I’m sure I’m not the only relatively new comer to baking.......am i?
Don’t get me wrong, i love trawling through these blogs and drooling over the smooth macaroons with their protruding silky middles, the sticky glossy pudding and the intricate piping on five tier cakes, BUT in everyday life for a new baker, i think i need to walk before i run......i would say crawl....but, i put myself above a crawl, i have a year of cake making under my belt, so naturally....you know :o)
I feel like there arn't many blogs for us new bakers out there, nothing where we can all trudge down the sweet & sticky path of baking together, almost everybody in the blogging world has been to Paris and expensive city restaurants, they have been to pastry schools and run their own businesses....let’s be honest, that is the dream and i can’t take that away from anyone, and I’m not trying too....the whole point of T-Cakery is to start at the bottom, honing my baking skills along the way, testing new methods, baking new things, learning new techniques and sharing these with you all, i know that some of you will be new bakers too and i think blogging from the bottom of this enormous task with all the up’s and down’s will relate to more of you than starting at the top............well, that’s what i look for in a blog, so hope you will all follow me on my journey, and share your stories with me on the way!!!