You may of noticed that I didn’t feature a Baking Bowl challenge this week, that was due to the amount of baking that I already had in the pipe line this week.
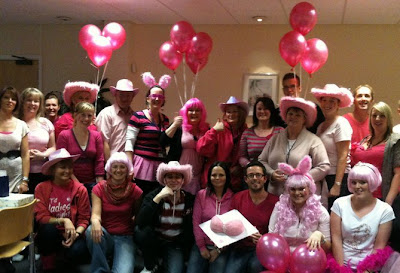
On Friday 29th we held a PINK Friday in work, this was held to raise money for breast cancer and I was asked to bake some goodies. In keeping with the pink theme, originally, I decided I was going to bring out the chocolate crinkles with a pink twist and some pink cupcakes. In the end, I made a batch of pink cupcakes, and a novelty boob cake which was to be raffled off.
For these little pink babies, I used my fool proof ‘Yellow Sponge Recipe’ which I actually found online. When I first came across this, it was measured in cups and not metric, the look and textured of this sponge sounded like something I had been looking for so I asked the owner of the recipe whether she could amend the recipe and show it in metric aswel, and she did this without a moments hesitation. I’m really glad I asked, because this is the best sponge I have made, and is the one I choose to make all my cakes with. The overall texture of this cake is soft and moist, but not oily and greasy. It stands up well when faced with fondant and yet is delicate enought to be draped in frosting and not be too bland!!
After this batter was mixed I added a small blob of pink colouring. I used the pink from the ‘Sugarflair Colours’ collection. This turned my batter a vivid colour which I thought would surprise people as they bit into it. (I didn’t manage to capture a picture of the inside of one of these lovely gems). To decorate these I made my trusty vanilla buttercream and again added a dollop of PINK colouring. Then I simply piped this over the cooled sponge and topped them off with two decorative chocolate hearts, one milk and one white.
To create my BOOB cake, I again used the ‘Yellow Sponge’ recipe and poured the batter into a two pint Pyrex dish. If you decide to do this, be sure to leave at least an inch and a half of space at the top of the bowl, this batter rises when being cooked and can easily flop out over the sides.
Once cooked, I halved the sponge and simply filled them with a vanilla butter cream before decorating the top with fondant.
Yellow Cake Recipe
INGREDIENTS
280g SR Flour
2 tsp baking powder
1/2 tsp salt
230g butter (I swear by Stork)
400g Caster sugar
4 egg yolks
2 tsp vanilla essence (or pods if you have these, one pod should be plenty)
240ml milk
4 egg whites
2 tsp baking powder
1/2 tsp salt
230g butter (I swear by Stork)
400g Caster sugar
4 egg yolks
2 tsp vanilla essence (or pods if you have these, one pod should be plenty)
240ml milk
4 egg whites
METHOD
- Preheat the oven to 180’ and line your chosen cake pan with baking paper, or grease it thoroughly with butter.
· Sift the flour, baking powder and salt into a bowl.
· In another bowl, cream the butter and sugar together for about 2 minutes. Add egg yolks one at a time, mixing well after each egg. Add in the vanilla.
- Add the flour mixture to the sugar/butter batter bits at a time, alternate this with the milk. You should begin and end with the flour. Try to add small amounts of milk at a time as too much milk will cause the mixture to split.
- Beat the egg whites in another bowl until soft to medium peaks. Make sure bowl and whisk are clean and grease free, or the eggs will not thicken. Fold half the egg whites in the batter to temper. Then fold in the rest of the egg whites.
- Pour batter in prepared cake tin(s) and bake for approx 45 minutes. The cake is ready when an inserted wooden skewer or cake tester comes out clean or when cake springs back when lightly pressed with a finger. (Remember this is a moist cake)
Buttercream Icing
An easy to make egg-free icing that works great for decorating cakes for birthdays. When you need to add colouring to icing, use colour paste. If you use liquid colouring, you may need to add more icing sugar.
Ingredients
250g butter, softened
1 teaspoon vanilla extract
600g icing sugar
2 tablespoons of milk
Preparation method
1. In a large bowl, cream together the butter and vanilla. Blend in the sugar, a quarter at a time, beating well after each addition. Beat in the milk, and continue mixing until light and fluffy. Keep icing covered until ready
2. to decorate.
Lots of lovely cakes were made on the day and we raised a lot of money for this brilliant cause!!!
Happy Baking
Toni – T - Cake


No comments:
Post a Comment